My what a busy year you have had.

My what a busy year you have had.

Well it has been a very, very, very busy year.

As I am sitting here having eaten a nice meal home cooked with my family and knocking back a nice cold elderberry champagne I must admit I am pretty content.

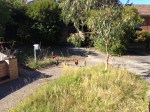
Not complacent just content. I wandered around my back yard this evening thinking I need to do this. I need to do that but I reminded myself of the many things I have done.

In some ways the approach I am taking to lighten my step on the earth is working but it is still way too heavy. I am not the worst or the best and if the whole world lived like me we would be in trouble. Conversely if the whole of Australia lived like me we would perhaps be starting down a better road (just my opinion here).

So where to from here? Well for me I intend to keep going. I have a number of things I would like to do this year as listed below but one of things I will do is take more time to spend with my family.

While I was always interested in the world and the long term living of within means, my children bring home why I have to continue to change.  For anyone reading this it is a long term thing. Each day you look at the world a little differently and hopefully a little better.

Achievements this year.

  • Garden more productive than last year.
  • Passive solar changes for the house underway
  • Front yard full of idea’s (most would call it full of junk)
  • 87 posts on this blog (some of them readable)
  • Lots of good meals with friends and family
  • Some bartering for services.
  • Lots of plant swaps.
  • Most of my seedlings self grown (or bartered)
  • New skills such as salami making, meat curing and stone carving learnt
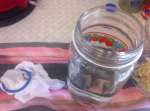
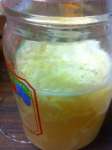
  • A lot of booze brewed (some of it even drinkable – cheers)
  • Foraging skills for plants, materials etc  increased.
  • Bees in the back yard
  • Started a few people on the road to growing their own gardens
  • A reconnection to local food through the garden, the ceres box, and the cheese and tofu coop.
  • And mostly two happy little kids who love the world.

It is short list but there is a good number of things to be happy for I think.

For next year

  • Shed move
  • Retaining walls.
  • Retro fit the house for energy saving
  • The new plot in the community garden
  • More garden beds
  • Cellar space
  • Harvest Honey
  • Hot house
  • More time with my family and of course…
  • two happy little kids who love the world 

This list is shorter as more things will creep in and the last two items will be a strong focus. Time spent smelling the roses and enjoying friends and family more.

I still had to work tonight and again tomorrow, a reminder of the bad old days for me in the corporate world but I am starting see that there is some light at the end of the tunnel. Happy to be working at the end of the day and working towards the rest of my goals

May you all have a great new years and safe break (if you are having one) see you all next year (yes that is tomorrow)

New Years Eve Dinner (yes it can be a food blog at times)
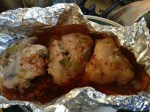
Chicken

  • 3 or 4 chicken thighs (you can use breast fillets but thigh are better flavour and will not dry out so much)
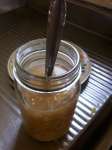
  • 2 table spoons fish sauce
  • 1 table spoon of soy sauce
  • Juice of 1 lime
  • Table spoon of water
  • 3 cloves of garlic crushed
  • Teaspoon of fresh chilli
  • Walnut sized piece of ginger grated
  • 4 or 5 spring onions sliced up.
  • 1 teaspoon of brown sugar (or coconut sugar)
  • 1 table spoon sesame oil

Put the chicken breasts in foil and pour over the rest of the ingredients you have mixed in a jug. Wrap up and seal the tin foil and cook in an oven at 170 degree Celsius for around 30 to 45 minutes (breast fillets 30 minutes, thighs longer)

Meat will fall off the bone and both children where getting right into it.
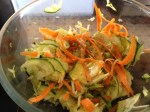
Salad

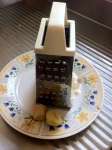
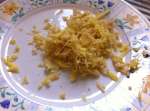
  • 1 cucumber sliced on grater slicer
  • 1 zucchini sliced on grater slicer
  • 1 carrot peeled and sliced with a peeler in long strips
  • 1 tablespoon of flaked almonds (I ran out tonight)

Mix vegetables together and season with macadamia/olive oil, vinegar salt and pepper  leave for a while then toss in the almonds prior to serving.

Works very well mixed together on a plate with chicken meat, and steamed rice.

Of Mallow and Strawberries

On Sunday I went and did the excellent Adam Grubb of Very Edible Gardens edible weed walk.

I am interested in foraging and already do some foraging eating nettles and wild fennel, converting sticky weed into bio fertilizer, getting into wild foraged elder and other trees. I have known about dock and dandelion and have eaten them before but wanted to improve my knowledge of the food options that we underestimate and are so widely available. Being self-sufficient is a part of what I am looking at and this is just one small part of the puzzle.

I won’t go into details as to individual plants in this post as this is an area that you are best to go and do a course with or/and get mentored and learn this important skill safely. I have done a courses with Ballarart Permaculture Guild and now with Adam and feel a level of comfort with what I know and don’t know (and have posted on things like nettles) but even then I use a field guide to check things out I am 100% sure of it.

Adam said at the start that you will look at the average plot of grass and weeds a bit differently after the course and yes this is certainly the case and last night I spotted about 5 different edible weeds in my back yard that there was good mallow plant up near the strawberries. So while the 3 year old got stuck into picking the strawberries I picked a handful of mallow buds or mallow cheese as they are known.

They have a nice crunchy texture and taste not unlike edame. So Sabrina and I brought in the strawberries to share and after seeing me eat the mallow she asked to to try it and low and behold she loved them eating them over the strawberries (she can be a strange child at times 🙂 )but she did then clean up the strawberries when the mallow was all done 🙂

Our rule is that you don’t have to eat a meal but you do have to try it and I am glad that this is now coming out in my daughter being willing to try anything.

So go out and learnt some new skills and learn to forage (and do it safely) and if like me you have a family then you might just manage to influence that next generation to something just a bit more sustainable.

Lacto Brewed Ginger Beer

I have been away for a while due to work commitments to study. It is one of those odd things that happens. I have a 5 year plan and I don’t think I will use this diploma I just got at the end of that 5 year plan but the next 5 years it will be required to lead to the end of the 5 year plan (I think that makes sense)

Sadly you have to balance out the ‘what you want’ versus what it takes to get there. For me it is a balance but one I am aware of and try to manage. I do not want to get to the point where lied to myself so much thinking I can sell my present to do what I want in the future but neither do I want to car wreck the future by doing only what I want rather than what I have to do.  

And also at the end of the day education is always a good thing. People should never stop learning formally or informally. To stop is to in a way to start the trip to death.

But enough of my musings. I have a lot to catch up on for everyone but I also want to spend the day in the garden so my balance for today is the short post below on brewing lacto ginger beer. Last year I did this and this year I am trying again and it is looking very promising with the starter brew smelling SO GOOD after a week of me helping mother nature make it.

To make the starter you need a clean sterilised large mouth jar. A cup and half to two cups of rain water (tap water is ok but boil it and leave 24 hours to get rid of any chlorination before using) . Add a tablespoon or so of grated peeled raw ginger. The amount depends on what you end up grating from the amount you peeled. No matter how much it is add an equal amount of sugar to it needs to be added. Cover opening of the jar with a piece of muslin cloth and rubber band.

Each day you add around the same amount of ginger and sugar and stir vigorously (I tend to swirl it once day as well) after a couple of days you should see bubbles forming and the lovely ginger beer smell will come of it.

It may take a bit longer as it depends what wild yeast is around and the conditions. This year has been great for wild yeast (as I discovered making elderflower cordial which is another story)

As with all my brewing but particularly when using a wild yeast process make sure you sanitise everything when I grate the ginger I pour boiling water over the grater and plate and leave for a minute or so and even pour it over the knife used to peel the ginger. I obviously make sure all of the spoon used to measure and add the ginger and sugar and the stir is clean and had had boiled water poured over it to clear.

I have a couple of more days of making the starter then I can make it up into beer and will post on that then.

Kids and Milk

So I still have to put up the bottling and pasteurization process of the first batch of the elderflower champagne. Work and life have been a bit busy so I am a bit behind on the posts. Sorry about that but I did warn you previously that I would live the life first and blog it second 🙂

So I thought I would at least drop a line having just missed my train on how things are going.

I am already into my second batch and the ale yeast is going great guns. Should be ready to bottle on Friday if not before. The morning and evening ritual of storing and smelling it, like my ritual of checking my seeds each evening helps to keep it all in perspective.

20121016-084336.jpg

20121016-084350.jpg

I also had to post this sign from my daughters crèche. Growing up with a milking cow at the house this is no biggie to me but for her this is great adventure. And I would have to say a positive thing for the kids to see. The dislocation of people from where their food comes from is a cause for many of the ills we see in our world so getting kids involved at such a young age is a great thing.

20121016-084146.jpg

Have a great day all and smell the roses (or brew) when you can

The Olla Bed

About a year ago I built an Olla bed. For those of you not familiar olla are a low tech unglazed earthen ware containers used to provide water directly to the roots of a plant.

A much better article than I could ever write is found at

http://permaculturenews.org/2010/09/16/ollas-unglazed-clay-pots-for-garden-irrigation/

With summer just around the corner (despite the sudden cold snap) I thought I had better give a report on how it is doing.

My Olla are not so pretty being made of some old clay pipe I had access to and some pot bases. I Sanded them to remove any glaze and used silicon to bind it all together. Over the last summer they lasted really well requiring a single fill up of the three olla to last the week.

I also incorporated a mini worm farm into the bed that helps to keep up the worms in the beds and compost it.

As you can see the beds are thriving. Last summer almost all of our salad vegetables came from this one bath tub. I was sick and tired of plastic packets of salad vegetables costing me a fortune and going bad after about two days.

The bed requires very little work to keep the plants maintained and as you are feeding directly to the roots of the plant the amount of weeds has been very minimal. I have used seedlings for the most part planting them around the Olla and this seems to work best for me, the developed roots seem to find the water without much trouble. Direct seeds seem to go the way of the weeds and not do as well.

This year I will be adding some herbs and more leafy greens to the mix and seeing how much I can push the system and how long the reservoirs will last with the bed fully loaded.

In the next week or two I will drop a post on the build process I went through.

Elderflower Tea and Put your feet up.

So been a busy day and just sitting back and relaxing with nice cup of elderflower and honey tea and reading a few blogs. 

Planning can take a back step for a few minutes and I am fairly content for a change. That will change tomorrow when I need to get through a list of things again but for now I will just enjoy it.

 Enjoy the day tomorrow all.

 Elderflower Teas.

Take one large elderflower head cover in a cup of boiled water. Stir in two teaspoons of honey. Leave for around 3 minutes then strain off the elderflowers and enjoy.

 Supposed to be good for you. I just like it because it tastes good and I enjoy it for the short elderflower season while I have access to it.